
To Proxmox, and Beyond!
With Broadcoms acquisition of VMWare, and the subsequent killing of the free EXSi license, not to mention where licensing costs look like they are being driven too with also killing off the perpetual licenses and forcing everyone into a subscription model I felt it was time to start looking at some alternatives.
Using the free version of EXSi in my home lab has been great for a couple of reasons, it allows me to test things out for work easily from the comfort of my living room without impacting company resources, but it also allows me to run a more robust home system like I do in the studio. Having my own domain, VPN and linux boxes running things like Piwigo for photos and references images has been great! With that license being killed off though, I didn’t want to get pidgeon holed into being stuck down the road, so now seemed like as good a time as any to give Proxmox a try and migrate over.
So with all that being said, lets dig into what I did, issues I ran into, and my general experience. Proxmox can either be installed on top of a Debian install or standalone same as EXSi, I opted to for the standalone for the simple sake of simplicity. While fairly comfortable in Linux I didn’t really want to have to manage storage, or worry about any other complexities. The image can be grabbed from Promox.com and you can get an image to suit your needs from here. Fire that off to a USB key using a util such as Rufus, and boot up on your hardware of choice and you should be off to the races.
I didn’t want to nuke my VMWare box quite yet, plus I needed the VMDK images off of it as well, so I spun up a Ryzen based NUC that I had laying around with a 128gig NVMe drive and a spare 2TB Samsung SSD for my images. This machine is newer and faster than my VMWare box, so it should be plenty good enough, plus it’s tiny! Win Win!
Going through the install of Proxmox is pretty straight forward, basically just follow the bouncing ball, the documentation for the install is located here. There are a few different ways you can get your images migrated over, and the day after I completed my migration Promox released a tool to make this easier which can be found here. I opted to transfer my images using an NFS share (I won’t outline that process here but will probably write another page later) that I setup on my NAS and then mapped on each of my hypervisors, this was nice and easy, and kept things safe if I screwed anything up (which I did, ain’t learning grand!).
A couple caveats though before you copy off the images, one I would highly recommend uninstalling the VMWare tools from your image, they also recommend in the documentation to set your network on your images to DHCP. I didn’t bother with the DHCP (this mostly caused windows to complain about an address being in use already on the now non-existant NIC), I did end up reimporting an image at one point because it became a nightmare trying to get the VMWare tools uninstalled with the VMWare subsytem not being present. I didn’t feel like having to chase down registry entries and manually deleting it. So installer beware! On the Linux image I had, I had zero problems, and only needed to set my static IP on the new NIC.
Next step in the migration is creating a new VM image. This is pretty straight forward, set your OS Type and version, CPU’s and Memory, and just leave the disk as default. Once the image is created just detach the disk, and then remove it. You’ll be attaching your old image as the new disk once you’ve imported it. I set my disk as SATA, with Discard checked off (TRIM) and SSE emulation (also didn’t need to do this as I was nuking the disk, but it helped me to remember to do it later). Everything else was defaults.
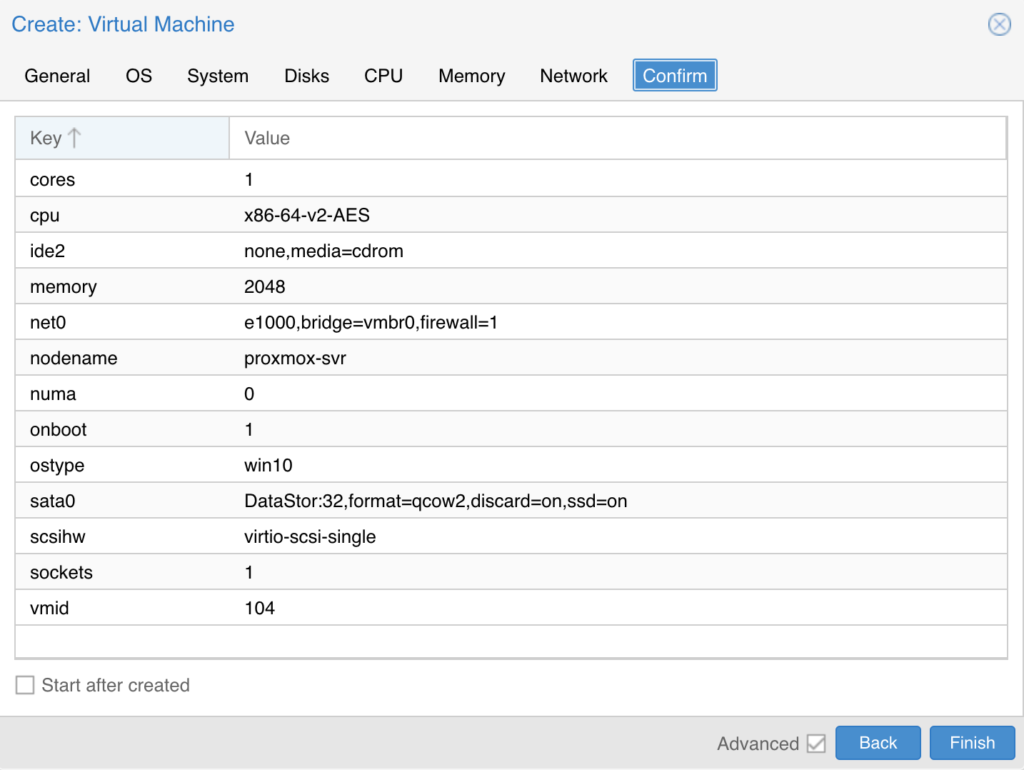
Take note of the VM ID you set (or that you just let automactically set for you! As you’ll need this for your image conversion and import, you should now have something that looks like the below.
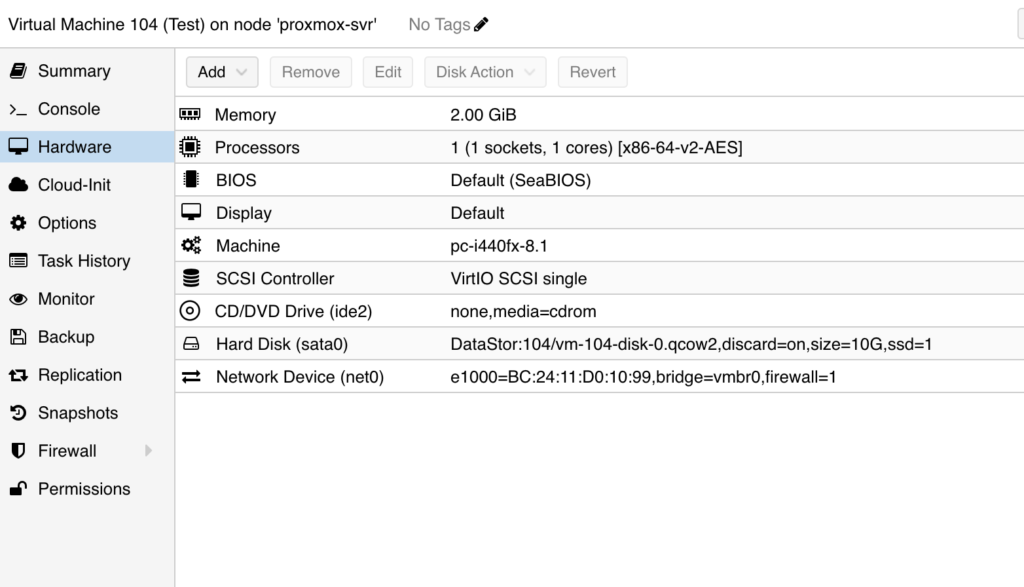
Click on the Hard Disk in the list and then “Remove” up top will change to “Detach”, click on that, the drive will change to Unsed Disk, now click on that and then “Remove” to kill the image we don’t need. Next you’ll need to import your drive, I’m going to assume that the NFS share option is being used, and this is the process that I went though. I can’t speak to the new tool, or using the OVA tool option either as I haven’t tried either of those or have any other images to migrate over at this time. Importing the image is easy, Under Datacenter and your server under that, you’ll want to click on shell and navigate your way to your NFS share located in /mnt/pve/{ShareName}.
From here find your image and the following command will convert and import your image over. This where you’ll want the VM ID, as you’ll need it for the command, because my storage isn’t ZFS I had to set a format type as well
qm disk import {target VMID} {vmdk file} {target storage}
qm disk import 104 Server.vmdk DataStor –format qcow2
Note: If the target storage stores the disk images as files, the –format parameter can be used to define the file format. Available are the following options: raw, vmdk, qcow2. The native format for QEMU/KVM is qcow2 (Block level storage doesn’t need converstion, like ZFS)
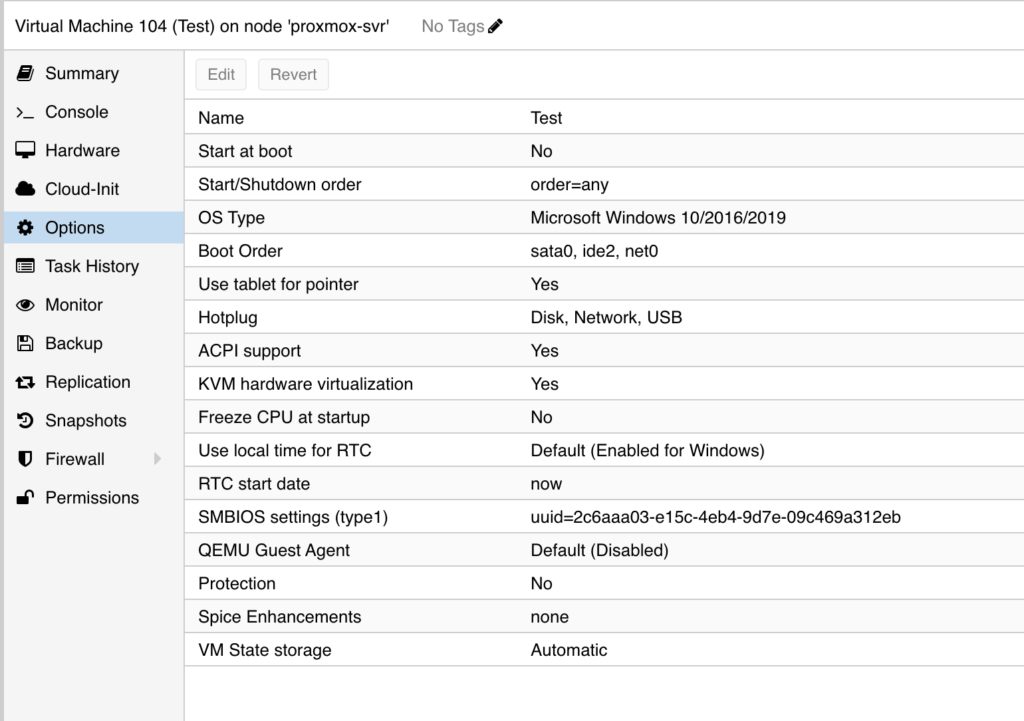
Once this is completed you should now have a detatched disk on your VM, you can now attach the disk, and edit it to set it to SATA, Discard and SSD Emulation. Before you fire up the VM you’ll want to head to the Options menu and set your boot order. I forgot to do this on my first install and it was a little bit of a pain to get out of the loop. I also needed to change the BIOS to OVMF on the Hardware tab, or my image wouldn’t boot. The default is Seabios, now THAT being said, on my new windows images I setup, Seabios is fine, it was just these VMWare imported images I needed to alter to get them to boot.
After the first boot I also needed to add an EFI disk to clear a warning on boot, without it the machine still booted it’s apparently for boot order and tiny. I don’t remember the exact process I went through to do this, but this is from the Proxmox forums.
In the Proxmox GUI you can add a new device under: Add -> EFI disk. And you can read the following here: https://pve.proxmox.com/wiki/Qemu/KVM_Virtual_Machines
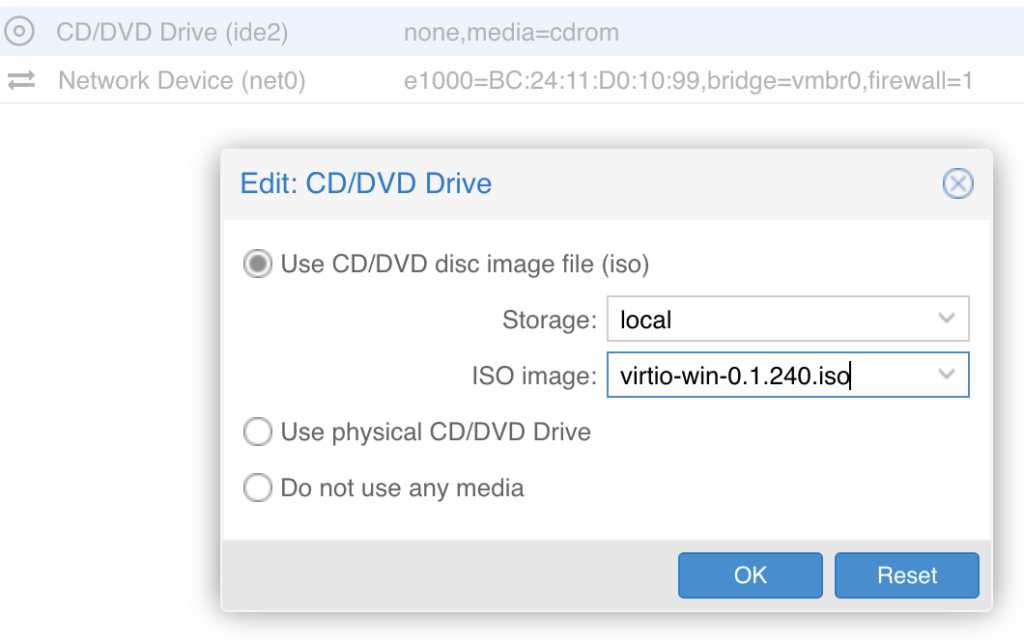
You will also want to mount (double click on the CD Rom Drive and select the VirtIO driver ISO), if you haven’t grabbed that and saved it to one of your ISO stores, you can get the image from here. Now fire up your VM, install your drivers from the mounted ISO. You can also install the QEMU agent from the disk as well. Enabling it in Options I believe is supposed to install it but it didn’t for me in any instance. But as soon as I had it installed, and enabled, I got the IP showing up for the VM on the summary page.
All in all, that really is all there was to it. I did end up rebuilding 2 of my VM’s but that was for reasons totally unrelated to the migration. Once I had my static IP’s set, everything seemed to be functioning. The below are from my notes on the setup and just a couple other things I kept in mind. Like making sure the Virtualization was enabled for the AMD box. Lastly I setup updates from the unstable channel based on someone elses recommendation and stating they haven’t had issues in years, so do that one at your own risk! Last thing I did was setup a backup schedule to run to my NFS share, weekly seeing as these VM’s don’t have much in the way of changes.
My next steps will be getting the Proxmox Backup server going on another machine so I can have more fine grained control of the backup process, but for now the built in is better than no backups at all!
Make sure IOMMU is enabled on motherboard, named differently for Intel/AMD
Enable Unstable Updates (been pretty stable since V6). Documentation can be found here. Be sure to edit the ceph.list file in /etc/apt/sources.list.d as well
Change/add to /etc/apt/sources.list
#not for production use
deb http://ftp.debian.org/debian bookworm main contrib
deb http://ftp.debian.org/debian bookworm-updates main contrib
# Proxmox VE pve-no-subscription repository provided by proxmox.com,
# NOT recommended for production use
deb http://download.proxmox.com/debian/pve bookworm pve-no-subscription
# security updates
deb http://security.debian.org/debian-security bookworm-security main contrib
Change /etc/apt/sources.list.d/pve-enterprise.list
comment out the enterprise line if you don’t have a sub, this avoids errors, save and exit
Cepth no subscription line addeded to the ceph.list and the enterprise line commented out.
Change /etc/apt/sources.list.d/ceph.list
deb http://download.proxmox.com/debian/ceph-quincy bookworm no-subscription
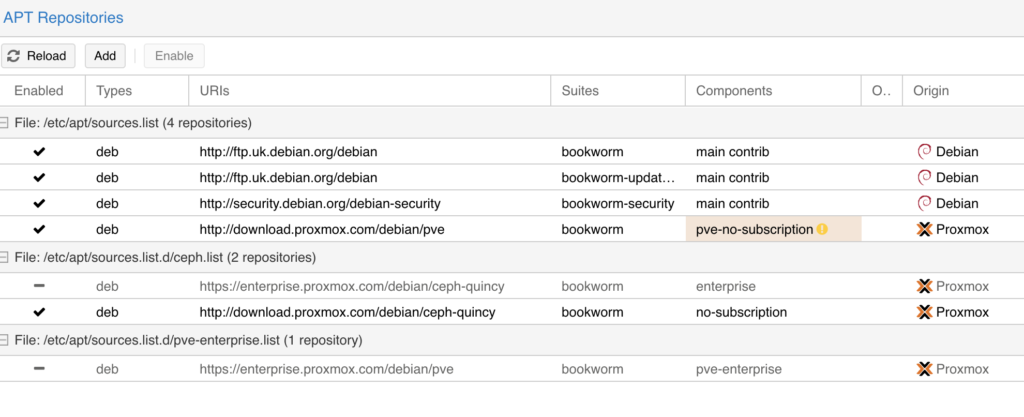
Repositories screen should look something like this now, and should be able to refresh, and upgrade without getting any errors now.
You can now run the following from the CLI, but I just ran the updates from the GUI to ensure no errors were being thrown as previous.
apt-get update
apt dist-upgrade


No Comments